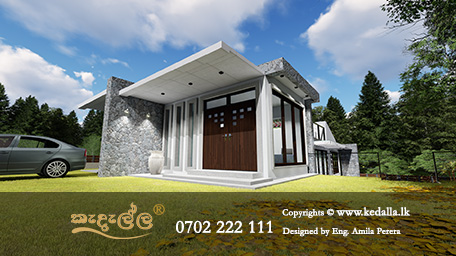
Welcome to the ultimate, definitive masterclass on how to build a house in Sri Lanka. Established on February 16, 2006, Kedella Design and Construction (Pvt) Ltd, operating under the renowned brand name Kedella Homes (Company Registration Number: PV-18553), has spent decades serving as a premier choice among house builders in Sri Lanka. While our deep roots are firmly planted in the Kandy region, our elite architectural services and full-scale house construction extend across the entire island nation. Whether you are a first-time local home builder, an experienced real estate investor, or a Sri Lankan living abroad longing to establish a permanent sanctuary back home, this extensive guide is customized specifically for you. Building a home is one of the most significant emotional and financial journeys you will ever embark upon. This guide systematically breaks down the entire lifecycle of house construction process in Sri Lanka into clear, sequential milestones. By reading further, you will gain comprehensive knowledge regarding architectural principles, legal approvals, site selection, micro-level budgeting, engineering execution, structural workflows, and interior aesthetics, ensuring your final build achieves absolute architectural excellence.
Secure Your Budget: The Advantages of Our Fixed-Price Building Contracts
Protect your budget with our legally binding, fixed-price contracts. Unlike fluctuating variable frameworks that leave you vulnerable to unexpected material and labor price hikes, our approach guarantees your final cost upfront. Enjoy complete financial certainty and peace of mind from day one of your build.
Read more on Advantages of Our Fixed Price Building Contracts.
Step 1 – Plan Your Budget with Precision for House Construction Sri Lanka
Financial discipline forms the absolute bedrock of successful house build strategies. Embarking on a construction journey without a highly detailed, line-item budget is the primary reason why many private housing projects across the country suffer from indefinite delays or total abandonment. To systematically shield your capital from unprecedented inflationary spikes and material shortages, you must establish an ironclad financial roadmap before a single shovel touches the soil of your land.
Estimate Construction Costs Through Professional Analysis
how much does it cost to build a house? Query cannot be solved using simple guesswork. A realistic financial blueprint relies heavily on knowing the accurate house construction cost in Sri Lanka metric, which is heavily influenced by the baseline House Construction Cost Per Square Foot in Sri Lanka. As of current market dynamics, raw material rates for structural grade river sand, aggregate, structural steel, and cement fluctuate significantly. Therefore, a modern building budget must calculate costs using ewithin a rigorous Quantity survey framework. Obtaining a professional construction estimate before laying a foundation will help prevent severe capital deficits later. Securing formal >construction financing via leading commercial banks in Sri Lanka requires an official Bill of Quantities (BOQ) endorsed by certified quantity surveyors or chartered engineers in Sri Lanka. This ensures your capital allocation perfectly matches the actual cost of building a house
Identifying and Mitigating Hidden Costs in the Local Market
One of the most widespread traps for homeowners figuring out how to build a house in Sri Lanka is overlooking accessory, non-structural expenses. These hidden variables can silently inflate your overall financial liabilities by millions of rupees if left unchecked during the initial planning phase:
- Design Fees: Comprehensive payments made to professional architects, civil engineers, and interior designers Sri Lanka for architectural blueprints, structural engineering layouts, and 3D interior renders.
- Government Approvals: Statutory payments, processing fees, and application charges due to local provincial councils, municipal offices, and environmental bureaus to obtain legal building permits.
- Utility Connections: Non-negotiable structural service deposit fees payable directly to the Ceylon Electricity Board (CEB) or Lanka Electricity Company (LECO) for multi-phase power grid connections, alongside the National Water Supply and Drainage Board (NWSDB) for mains water access.
- Boundary Walls (Parapet Walls): Essential peripheral protection systems. Constructing structural boundary walls over uneven terrain requires extensive random rubble masonry and structural reinforcement, which can add substantial costs depending on your land's perimeter length.
- Landscaping: Surface styling, grading, laying turf, and implementing comprehensive open-to-sky drainage channels managed by professional landscape designers to combat severe monsoonal runoff.
- Contingency Fund (5% to 10%): An absolute financial safety cushion. You must explicitly set aside 5% to 10% of your total capital budget strictly to absorb sudden inflationary material cost spikes or emergency site changes without halting physical progress on your house construction timeline.
Estimated Capital Allocation Framework for Residential Construction
| Cost Category Component |
Percentage of Total Project Budget |
Primary Focus Area / Deliverables |
| Civil Works & Structural Shell |
45% - 55% |
Excavation, Foundation, Concrete Framework, Columns, Brickwork, Slabs |
| Finishes, Flooring & Joinery |
20% - 25% |
Plastering, Tiling, Custom Cabinetry, Doors, Windows, Specialized Fittings |
| MEP Utility Installations |
10% - 15% |
Electrical Wiring, Plumbing Mains, Septic Systems, CCTV, Automation Lines |
| Architectural Fees & Approvals |
5% - 7% |
Blueprints, Engineering Sign-offs, Local Authority Permits, Survey Plans |
| Emergency Contingency Reserve |
5% - 10% |
Inflation Absorption, Unplanned Site Realignment, Subsoil Stability Fixes |
Step 2 – Choose the Right Land for Residential Construction Sri Lanka
Selecting the right property involves much more than just finding a scenic view or an attractive price tag. In home building, the physical, legal, and environmental qualities of your chosen property directly dictate the ultimate complexity and total cost of your physical build.
Verify Land Ownership and Title Deeds Thoroughly
Before entering a legally binding purchase agreement, you must thoroughly verify the legal status of the land. Confirming land ownership requires an exhaustive title search going back at least 30 to 40 years at the relevant regional Land Registry. This ensures the property deeds are absolutely clear, unencumbered, and free of any hidden family disputes, historical mortgages, or state acquisition notices. Working with a qualified legal professional prevents future ownership challenges and guarantees your bank loan approvals proceed smoothly.
Check Soil Conditions and Structural Subsurface Load Capacities
The underlying soil composition greatly impacts how you plan out how to build a house in Sri Lanka. Low-lying lands, former paddy fields, and filled plots often have weak subsoil profiles that require specialized, expensive deep foundations like pile driving or continuous raft foundations. Conversely, firm laterite soil (Cabook) or rock formations offer excellent load-bearing properties. Getting a professional geotechnical engineer to perform a soil test prevents unexpected structural shifts and helps you avoid costly errors during foundation work.
Access to Key Utilities and Critical Infrastructure
A plot of land that lacks direct access to public infrastructure can lead to major unexpected expenses during your build. Check if a high-voltage public power line is close enough to avoid having to pay for expensive supplementary utility poles. Similarly, confirm that a reliable public water main is nearby. If public water isn't available, you'll need to factor in the cost of drilling a deep artesian well, along with the necessary water testing and filtration equipment.
Assess Local Flood Risks and Environmental Factors
With changing weather patterns causing intense monsoon seasons across Sri Lanka, evaluating historical flood levels is essential. Inspect the property's natural topography, local drainage channels, and general elevation compared to the nearest main road. Building in a low-lying zone means you will need to invest heavily in raised plinth beams, complex retaining walls, and advanced waterproofing systems to protect your home from water damage.
Are you looking for a stress-free path to ownership? If you already have your own plot of land, you can browse through our extensive collection of over 1,000 custom architectural concepts to find your ideal layout. Our team will handle everything from local council approvals and budget planning to comprehensive BOQ preparation and complete physical construction. Alternatively, you can select one of our premium, pre-approved turn-key properties designed for hassle-free living.
Select A Plan from our 1000+ house plans collection to begin your journey or select a Ready to Build House from Kedella Homes.
Or, if you prefer a completely custom design tailored specifically to your lifestyle, book a consultation with our architects to begin your journey.
We also offer exclusive, company-owned land packages complete with pre-approved house plans and ready-to-go BOQs. This allows you to skip the long administrative delays and start building your home right away. Select A House and Land Package to start your construction journey today.
Step 3 – Design Your House to Achieve Lasting Architectural Excellence
The design stage transforms your personal vision into a functional, structural reality. True architectural excellence balances modern style with structural integrity, ensuring your home is both beautiful and built to last.
Hire an Experienced Architect or Architectural Firm
Working with a generic, uncertified draftsman is one of the most common mistakes to avoid when building a house. A fully qualified professional brings a deep understanding of spatial dynamics, ventilation, and structural load pathways to your project. They turn your ideas into accurate, construction-ready blueprints while navigating complex urban planning guidelines. This ensures your home is structurally sound, legally compliant, and uniquely tailored to your lifestyle. Ready to take the first step? book a consultation with our architects today to design your dream home.
Select an Optimal Floor Plan or Create a Custom Design
Your choice of a floor plan impacts your everyday comfort and long-term convenience. You can either customize an existing template or design a new layout from scratch. Your floor plan should reflect your family's daily routines, balancing open-concept shared living spaces with quiet, private bedrooms. It should optimize natural traffic flow and position high-use areas like the kitchen and bathrooms for maximum efficiency.
Consider Future Structural Expansion from the Start
A smart home design adapts to your family's changing needs over time. Even if you are only building a single-story layout today, planning for future vertical or horizontal extensions saves significant time and money later. Inform your engineering team early so they can size the foundation footings, concrete ground columns, and load-bearing walls to safely handle the weight of an extra floor down the road. This forward-thinking approach prevents the need for costly structural reinforcement when you decide to expand.
Incorporate Climate-Friendly, Sustainable Architecture
Building in a tropical climate like Sri Lanka requires smart design choices to manage heat and humidity naturally. Incorporating passive cooling techniques—such as high ceilings, strategically placed cross-ventilation windows, wide overhanging roof eaves, and central open-to-sky courtyards—helps keep your home comfortable year-round. These thoughtful design details reduce your reliance on artificial air conditioning, lowering your energy consumption and creating a more sustainable living environment.
Step 4 – Obtain All Necessary Building Approvals and Legal Permits
Navigating the legal approval framework is a critical step when figuring out how to build a house in Sri Lanka. Proceeding with construction without the necessary state permits can lead to severe penalties, heavy fines, or even court-ordered demolition. Securing proper approvals guarantees that your home is fully compliant with national zoning laws and building regulations.
The formal review process requires submitting a comprehensive documentation package to your local governing authority, such as a Municipal Council (MC), Urban Council (UC), or Pradeshiya Sabha (PS). Depending on your location and the land's environmental sensitivity, you may also need clear approvals from specialized state institutions:
- National Building Research Organisation (NBRO): Compulsory for projects in hill country regions like Kandy or Matale to evaluate landslide risks and confirm slope stability.
- Central Environmental Authority (CEA): Required if your property sits near protected natural reserves, wetlands, or sensitive water ecosystems to ensure environmental protection.
- Road Development Authority (RDA) / Provincial Road Development Authority (PRDA): Necessary if your land borders a primary or secondary highway to verify the correct building boundaries and road setbacks.
- Forest Department / Mahaweli Authority: Required if your plot falls within protected river basins or state-managed agricultural zones.
Your design must strictly follow the updated Urban Development Authority guidelines. These building regulations define strict rules for plot coverage ratios, rear and side space clearances, maximum building heights, and proper light ventilation shafts. The formal approval process begins by submitting your land's surveyed deed, certified survey plans, and complete architectural and structural drawings signed by authorized professionals. Once reviewed, the local council issues a formal building permit and a Development Permit, which officially clears the way for construction. The average processing time for these permits typically ranges from 3 to 12 weeks, depending on the complexity of your site and the speed of local administrative reviews.
Step 5 – Hire Certified Construction Professionals and Skilled Trades
A beautiful design only succeeds if it is built with high-quality execution. Entrusting your project to uncertified, low-cost labor is a common path to structural issues, budget overruns, and legal problems. Working with qualified, registered experts ensures your home is built to the highest professional standards.
The Essential Professional Consulting Team
Your core technical team should consist of fully qualified professionals registered with their respective national governing bodies:
- Architect / Chartered Architect: Must hold active registration with the Sri Lanka Institute of Architects (SLIA). They oversee spatial aesthetics, functional planning, and overall design integrity.
- Structural Engineer: Must be a Chartered Engineer registered with the Institution of Engineers, Sri Lanka (IESL). They calculate the exact structural dimensions, concrete grades, and steel reinforcement schedules needed to guarantee absolute safety against environmental stresses.
- MEP Engineers: IESL-registered professionals who design the mechanical, electrical, and plumbing infrastructure. They plan efficient power distribution, safe drainage runs, and integrated home automation systems.
- Quantity Surveyor: Must be certified by the Institute of Quantity Surveyors Sri Lanka (IQSSL). They specialize in strict financial tracking, material cost optimization, and detailed BOQ auditing.
Looking for an experienced team to manage your project from start to finish? book a consultation with our architects to bring verified expertise to your build.
Skilled Trades Needed for Seamless Execution
On the ground, executing a high-quality build requires an organized team of specialized, experienced trade professionals working under strict technical supervision:
- Masons & Steel Fixers: Handle critical structural stages including excavation, concrete pouring, precision brickwork, and assembling reinforcing steel cages.
- Carpenters & Roofers: Install structural timber or light-gauge steel roof frames, lay roof tiles, and handle precision finish carpentry like doors, frames, and custom cabinetry.
- Electricians & Plumbers: Install hidden conduits, run safe electrical distribution wiring, set up leak-proof water supply lines, and install robust waste drainage networks.
- Welders & Iron Workers: Fabricate custom structural steel supports, protective window grills, main gates, and internal stair railings.
- Painters & Landscapers: Apply weather-resistant exterior coatings, smooth interior wall finishes, level surface soil, and install green lawns and outdoor elements.
- Heavy Equipment Operators & Laborers: Operate excavators and backhoes for site clearing, handle raw material transport, and keep the job site clean and organized.
Step 6 – Comprehensive Site Preparation and Engineering Layouts
Before structural work begins, the construction site must undergo systematic preparation. Proper site staging creates a safe, organized, and efficient environment for your building team.
The preparation process follows a strict engineering sequence:
- Clearing the Site: Remove all heavy vegetation, surface roots, large rocks, and organic debris. If the property contains old, unstable structures, they must be safely demolished and the waste disposed of according to local environmental rules.
- Engineering Surveying: Measure the exact property boundaries using high-precision surveying instruments. This step identifies existing trees, utility lines, and the natural slope of the land while confirming the soil's stability.
- Temporary Utilities & Infrastructure: Set up an on-site project management office, secure worker restrooms, and install temporary electrical connections and a reliable construction water supply.
- Material Storage Staging: Build covered, weatherproof storage areas to protect sensitive materials like cement bags, structural steel, and plumbing fixtures from moisture and rain.
- Utility Protection: Locate and clearly mark any underground public infrastructure, such as water mains or telecom lines, to prevent accidental damage during excavation.
- Site Boundaries & Security: Install strong perimeter fencing or hoarding around the property. Place clear warning signs and set up controlled access points to keep unauthorized visitors off the site.
- Earthworks & Grading: Excavate high areas and fill low sections to level the plot according to your architectural elevations. The soil must be mechanically compacted to the required engineering density to prevent future settling.
- Drainage & Erosion Controls: Cut temporary drainage channels and install sediment fences to manage heavy rainwater runoff and prevent soil erosion during the build.
- Site Access Preparation: Build strong temporary access paths so heavy concrete trucks and delivery vehicles can enter and exit the site safely without getting stuck.
- Marking the Building Layout: Use precise surveying equipment to transfer your architectural floor plans onto the ground, marking exact foundation trenches, column centers, and wall lines.
- Safety Protocols: Implement a comprehensive site safety plan, hand out mandatory Personal Protective Equipment (PPE) like hard hats and steel-toe boots, and run safety briefings for all workers.
- Pre-Construction Inspection: Perform a final joint walkthrough with your engineering team to verify the layout dimensions, compaction results, and permits before pouring the first layer of concrete.
Step 7 – Build a Strong, Climate-Resilient Foundation
The foundation is the most critical structural part of your home, bearing the entire weight of the building. A properly engineered foundation protects your house from uneven settling, wall cracks, and moisture issues.
Building a high-quality foundation requires a careful, step-by-step process:
- Site Setting Out: Double-check the layout lines using durable wood batter boards and high-tension strings to ensure every corner forms a perfect 90-degree angle.
- Excavation: Dig the foundation trenches down to firm, unshifted soil layers according to the structural engineer's exact depth specifications.
- Soil Preparation & Screed: Compact the bottom of the trenches thoroughly and pour a thin layer of lean concrete (screed) to create a clean, level surface for the steel reinforcement.
- Random Rubble Masonry (RRM): Build strong, traditional stone foundations using high-grade granite blocks bonded together with rich cement mortar to distribute the building's weight evenly.
- Reinforcement & Footings: Assemble and place the heavy structural steel rebar cages for the main column footings based on your engineering drawings.
- Concrete Footing & Column Bases: Pour high-strength, ready-mix concrete into the footing forms, using mechanical vibrators to eliminate air pockets and ensure solid strength.
- Plinth Beam Construction: Cast a continuous reinforced concrete beam along the top of the foundation masonry to tie the structural columns together and prevent uneven ground shifting.
- Foundation Waterproofing: Apply a thick layer of premium bituminous waterproofing compound over the plinth beams and raw masonry to block ground moisture from seeping up into your living areas.
- Drainage Integration: Install perforated drainage pipes wrapped in filtration geotextiles along the outer foundation wall to channel heavy groundwater away from the structure.
- Backfilling & Compaction: Fill the open spaces inside the foundation trenches with clean, non-organic soil or sand, compacting it in thin layers to create a firm, solid base for the ground floor slab.
- Foundation Inspection: Have your structural engineer review the completed work, verifying the steel placement, concrete quality, and waterproofing before proceeding with the main structure.
Step 8 – Core Structural Construction and Precision Brickwork
With the foundation securely in place, work moves upward to build the main structural skeleton of the home. This phase focuses on creating the load-bearing framework that gives the building its shape and strength.
Constructing Strong Columns and Beams
Vertical concrete columns and horizontal tie beams form the main structural frame of modern homes. Workers set up precision wood or steel formwork, position heavy structural steel reinforcement cages, and pour high-grade concrete. This framework carries the weight of the roof and upper floors, transferring it safely down to the foundation.
Building Precision Brickwork and Load-Bearing Walls
Once the concrete frame cures, workers begin building the walls using high-quality local materials like burnt clay bricks, engineered cement blocks, or cabook stones. These walls are laid with rich cement mortar, keeping lines perfectly plumb and level. Proper wall construction provides excellent structural stability, thermal insulation, and sound protection between rooms.
Casting Solid Floor Slabs and Upper Levels
For multi-story designs, constructing upper floor slabs requires careful engineering. Workers set up strong temporary scaffolding and formwork, lay out a dense grid of steel reinforcement rebar, and install conduits for electrical and plumbing lines. Concrete is poured in a continuous operation to create a solid, gap-free floor slab that is kept damp for several days to achieve maximum strength.
Building Safe, Ergonomic Staircases
Internal and external staircases connect your living spaces safely and comfortably. Building a staircase requires precise calculations for tread depth and riser height to ensure easy, comfortable walking. The steel rebar must be anchored securely into the main floor beams before pouring the concrete step structure.
Installing Long-Lasting Roof Structures
The roof protects your home from tropical rain and intense sun. Depending on your architectural style, you might choose a durable timber or light-gauge steel frame topped with classic clay roof tiles, or opt for a modern, water-shielded flat concrete roof slab. Proper thermal insulation layers and high-quality under-tile waterproofing membranes are essential to prevent leaks and keep your home cool.
Step 9 – Mechanical, Electrical, and Plumbing (MEP) Infrastructure
The MEP phase builds the essential internal networks that bring comfort, safety, and functionality to your modern home. This work happens behind the scenes, hidden inside walls and under floors.
This stage covers several critical utility installations:
- Electrical Conduit Routing & Wiring: Running fire-retardant PVC conduits inside wall channels before plastering. High-grade, insulated copper wiring is pulled through to power light fixtures, sockets, and heavy appliances safely.
- Integrated Security & Communications: Installing low-voltage wiring pathways for high-definition CCTV cameras, security sensors, door access controls, and whole-home internet access.
- Plumbing Networks & Supply Lines: Installing durable, leak-proof PPR or Type-100 PVC pipes for hot and cold water distribution, ensuring reliable pressure throughout the house.
- On-Site Septic Systems: Building an efficiently sized, dual-chamber septic tank and a properly designed soakage pit to handle wastewater safely and protect local groundwater.
- Main Water Supply Integration: Setting up main incoming water lines, automated water pumps, and heavy-duty overhead storage tanks to maintain constant water pressure.
- Safety & Pressure Testing: Running rigorous pressure tests on all plumbing lines to check for leaks, and performing insulation resistance tests on electrical circuits before closing the walls.
Step 10 – High-End Interior and Exterior Finishing Works
The finishing stage transforms raw concrete and brickwork into an elegant, welcoming living space. This phase focuses on surface quality, fine details, and lasting visual appeal.
Finishing work covers all major interior and exterior surfaces:
- Interior Wall Plastering: Applying a smooth, level layer of cement lime mortar over raw brickwork to create a flawless surface for paint or wallpaper.
- Exterior Weather Plastering: Using durable, water-resistant plaster mixes on outer walls to protect the building from heavy monsoon rains and prevent damp spots.
- Premium Flooring Installations: Laying down high-quality porcelain floor tiles, natural granite slabs, polished marble, or treated timber flooring with tight, clean grout lines.
- Custom Ceiling Design: Installing elegant gypsum board ceilings, clean composite panels, or warm natural timber ceilings to hide utilities and allow for beautiful recessed lighting.
- Multi-Coat Painting Systems: Applying protective primers followed by multiple coats of premium, low-VOC washable interior paints and weather-shielding exterior coatings.
- Custom Kitchen Layouts: Building functional, modern kitchens complete with durable granite countertops, high-quality composite cabinetry, soft-close hardware, and integrated appliances.
- Modern Bathroom Fit-Outs: Laying anti-slip floor tiles, applying advanced waterproof barriers, and installing high-end sanitaryware, glass shower enclosures, and premium chrome fittings.
- Custom Doors & Frames: Fitting seasoned, warp-resistant local hardwoods like Teak, Mahogany, or Jackwood for secure, beautiful main entries and interior doors.
- Premium Windows & Glazing: Installing powder-coated aluminum or uPVC window frames with thick tempered glass to provide excellent weather sealing, wind resistance, and insulation.
Step 11 – Final Inspection, Documentation, and Moving In
The final stage safely brings your construction journey to a close, taking you from a completed building site to a fully legal, ready-to-live-in home.
The handover process involves several key steps:
- Thorough Final Inspection: Conducting a complete, detailed walkthrough with your construction team to find and fix any minor paint touch-ups, hardware adjustments, or surface cleaning needs.
- Obtaining the Certificate of Conformity (COC): Submitting your completed building files to the local council. Municipal inspectors will visit the site to verify that the house matches the approved plans before issuing your official COC.
- Activating Main Utilities: Presenting your legal COC to public utility boards to transition from temporary construction lines to permanent, lower-rate residential electricity meters and mains water accounts.
- Deep Cleaning the Property: Hiring a professional cleaning service to remove all construction dust, paint residue, and chemical marks from windows, floors, and fixtures.
- Official Move-In Handover: Receiving your final keys, component warranties, equipment manuals, and completed structural drawings, allowing you to move into your new home with complete peace of mind.
Common Mistakes to Avoid When Building a House in Sri Lanka
Building a home is a complex project, and small oversights early on can turn into expensive problems later. Being aware of common pitfalls helps you keep your project on track, on budget, and structurally sound.
- Buying Land Without Legal Document Verification: Skipping a proper title search can trap you with hidden property disputes, old mortgages, or zoning issues that make it impossible to get a building permit.
- Choosing Contractors Based Only on the Cheapest Quote: The lowest estimate often leads to poor craftsmanship, substandard materials, unapproved budget increases, or an unfinished project. Work with proven House Contractors with a clear track record.
- Ignoring Proper Land Drainage and Elevation: Failing to raise your ground floor level above the local road or road-widening lines can lead to indoor flooding and damp walls during heavy rains.
- Underestimating the Real Cost of Building: Forgetting to budget for essential finishes, landscaping, utility connection fees, and inflation can exhaust your funds before the house is completed.
- Making Frequent Design Changes During Construction: Changing your floor plans after concrete has been poured creates expensive rework, material waste, and lengthy project delays.
- Skipping Key Engineering Inspections: Rushing past vital checks—like reviewing steel reinforcement layout or testing concrete strength—can hide serious structural issues inside your walls.
Smart, Effective Ways to Save Money on Your Build
Building a high-quality home doesn't mean you have to overspend. With smart planning and strategic choices, you can optimize your budget without compromising on structural safety or style.
- Opt for Simple, Clean Geometric Layouts: Designing a home with clean square or rectangular lines reduces the cost of complex concrete forms, specialized steel layouts, and labor-intensive masonry work.
- Design Highly Efficient Floor Plans: Cut down on wasted space like overly long hallways. Open-concept living and dining areas make your home feel larger while reducing the number of walls you need to build.
- Buy Core Building Materials in Bulk: Purchasing essential materials like cement, rebar, and tiles in large quantities early helps you secure wholesale prices and protects you from sudden inflation.
- Get and Compare Detailed Contractor Quotes: Avoid vague estimates. Request comprehensive, line-item BOQs from multiple certified contractors to compare pricing clearly and avoid hidden costs.
- Invest in Energy-Efficient Design Features: Incorporate natural cross-ventilation, wide roof eaves for shade, and LED lighting layouts. Adding solar power and Rainwater harvesting systems will significantly lower your monthly utility bills.
- Plan Smartly for Future Extensions: If your budget is tight, design a multi-story home but build it in stages. Ensure your initial foundation and columns are strong enough to support upper floors later, allowing you to expand whenever you are financially ready.
House Construction Cost Calculator
Frequently Asked Questions Regarding House Construction in Sri Lanka
How much does it cost to build a house in Sri Lanka?
The total cost depends on your home's size, design, location, and the quality of finishes you choose. It is calculated based on current material costs and labor rates, tracked through a professional Bill of Quantities (BOQ). Working with certified professionals ensures you get an accurate, clear cost estimate tailored to your project.
How long does the typical house construction process take?
A standard single-story house usually takes 4 to 6 months to complete, while a multi-story home can take 8 to 12 months. Timelines can change based on the complexity of the design, local weather conditions, and steady financing.
Do I really need to hire a registered architect?
Yes. A registered architect ensures your home is structurally safe, designed efficiently for your lifestyle, and fully compliant with local building regulations. They also create the exact technical drawings required for bank loans and local council approvals.
What core permits are required before construction starts?
You must obtain a certified survey plan, a formally approved Building Plan, and a Development Permit from your local council (Pradeshiya Sabha or Municipal Council). Properties in hilly areas or near main highways may also require approvals from the NBRO or RDA.
What is the average cost per square foot for residential builds?
The cost per square foot varies depending on your chosen structural materials, flooring, custom woodwork, and bathroom fittings. Getting a detailed, itemized BOQ from a qualified quantity surveyor is the best way to determine the exact cost for your design.
Can I build my residential home project in distinct stages?
Yes. You can build your home in stages to better manage your cash flow. If you plan to expand later, ensure your initial foundation, structural columns, and plumbing lines are designed from day one to support future additions safely.
Should I hire a professional building contractor or manage the project myself?
Managing a project yourself requires significant construction knowledge and a lot of daily free time. Hiring an experienced, certified contractor provides professional project management, skilled labor, material discounts, and a structural warranty, saving you from costly mistakes.
What are the most durable and cost-effective building materials locally?
Traditional burnt clay bricks and high-strength concrete blocks offer excellent durability and thermal insulation for walls. For roofs, local clay tiles or light-gauge steel frames provide long-lasting protection against tropical weather.
Versatile Architectural Styles and Housing Types We Expertly Construct
Every family has unique lifestyle needs and aesthetic preferences. We offer a diverse range of architectural designs tailored to different tastes, budgets, and land sizes across Sri Lanka:
- Single Story Houses: Perfect for young families or retirees looking for accessible, stair-free living with comfortable, efficient floor plans.
- Two Story Houses: Ideal for maximizing floor space on smaller urban plots, separating busy living areas from quiet, upstairs bedrooms.
- Three Story Houses: Excellent for large families or multi-generational homes in major cities, offering spacious living and private areas.
- Box Type Houses: Sleek, minimalist designs featuring clean straight lines, flat roofs, and open spaces that maximize natural light.
- Premium Quality Houses: High-end homes featuring customized amenities, premium finishes, and beautifully integrated outdoor swimming pools.
- Luxury Villas: Expansive, high-end properties with custom architectural layouts, premium imported finishes, and beautiful outdoor living areas.
- Modern Houses: Contemporary styles focusing on open layouts, functional spaces, and energy-efficient building features.
- Contemporary Homes: Ever-evolving designs that balance current architectural trends with warm, natural materials and practical living spaces.
- Tropical Houses: Specifically designed for warm climates, utilizing wide verandas, indoor courtyards, and cross-ventilation to keep spaces naturally cool.
- Small Tiny Houses: Smart, highly compact layouts designed to maximize utility and comfort while keeping building costs affordable.
- Large Family Homes: Spacious multi-bedroom floor plans with generous living areas, perfect for busy, growing families.
- Holiday Homes & Relaxing Bungalows: Beautifully designed getaways built to embrace their natural surroundings, offering peace and comfort in the countryside or hill country.
- Traditional Homes: Timeless designs inspired by classic Sri Lankan architecture, featuring deep verandas, central courtyards, and elegant woodwork.
We also specialize in maximizing utility on compact city plots, offering custom architectural designs optimized for smaller land parcels:
A Showcase of Our Recent Completed Residential Building Projects
Take a look at some of our successfully handed-over custom construction projects across the island, showcasing high-quality execution and unique designs:
- Project 1: Modern 5000 Sq.Ft. Three Story House Construction in Sri Lanka
Designed and built on a 28 Perch land in Bowala, Kandy. Featuring expansive living areas, custom wood finishes, and a modern roof deck.
View Project Details | Completion Time: 10 Months.
- Project 2: Luxury 3000 Sq.Ft. Three Story Hillside House Construction in Sri Lanka
Designed and built on a 30 Perch hillside plot in Digana, Kandy. Structured with specialized foundations to complement the natural sloping terrain.
View Project Details | Completion Time: 8 Months.
- Project 3: Beautiful 2300 Sq.Ft. Two Story House Construction in Sri Lanka
Designed and built on a 12 Perch land plot in Gampola. An elegant family home featuring an open layout and natural cross-ventilation.
View Project Details | Completion Time: 9 Months.
- Project 4: An Affordable 1800 Sq.Ft. Single Story House Construction in Sri Lanka
Designed and built on a 10 Perch plot in Haputale. A cost-effective, practical layout focused on durability and excellent space efficiency.
View Project Details | Completion Time: 4 Months.
- Project 5: Modern 2200 Sq.Ft. Box Type House Construction in Sri Lanka
Designed and built on a 15 Perch land in Gelioya, Peradeniya. A minimalist design featuring bold lines, large windows, and an open layout.
View Project Details | Completion Time: 7 Months.
- Project 6: Modern 2000 Sq.Ft. Two Story House Construction in Sri Lanka
Designed and built on an 18 Perch plot in Katugastota, Kandy. A contemporary suburban home with custom finishes and a functional family layout.
View Project Details | Completion Time: 6 Months.
Professional Certifications, State Memberships, and Clear Authenticity
Building a home requires working with a team you can trust. Kedella Design and Construction (Pvt) Ltd is fully certified and recognized by Sri Lanka's primary construction and engineering authorities:
- CIDA Grading (Construction Industry Development Authority): Officially registered as a qualified Civil Engineering and Building Construction contractor, meeting strict national quality and safety standards.
- NCASL Corporate Membership: An active corporate member of the National Construction Association of Sri Lanka, committed to professional building standards.
- Provincial Council Licensing: Registered as an authorized Provincial Contractor and Business Entity under the Central Provincial Council of Sri Lanka (License: CPC/541).
- Registered Legal Trademark: Our brand name and designs are fully protected under official Registered Trademark No: 209708, published in the Government Gazette No. 2045. Learn more by visiting our Trademark Details.
Conclusion – Take the First Step on Your Home Building Journey Today
Building your dream home in Sri Lanka is a rewarding journey when you have the right planning and professional support. Success relies on starting with a practical, detailed budget, securing clear legal permits early, choosing the right professionals, and maintaining clear communication throughout the build. By taking a organized, step-by-step approach, you ensure your project runs smoothly and results in a beautiful, long-lasting home.
Ready to bring your vision to life? Get in touch with our team of experts today. book a consultation with our architects to start planning your build, or visit our interactive planning portal to Send us your Wishlist and begin your custom construction journey.